Dr. Abhishek Jain

Contact us on  +91-84473 86864, +91-95990 23002

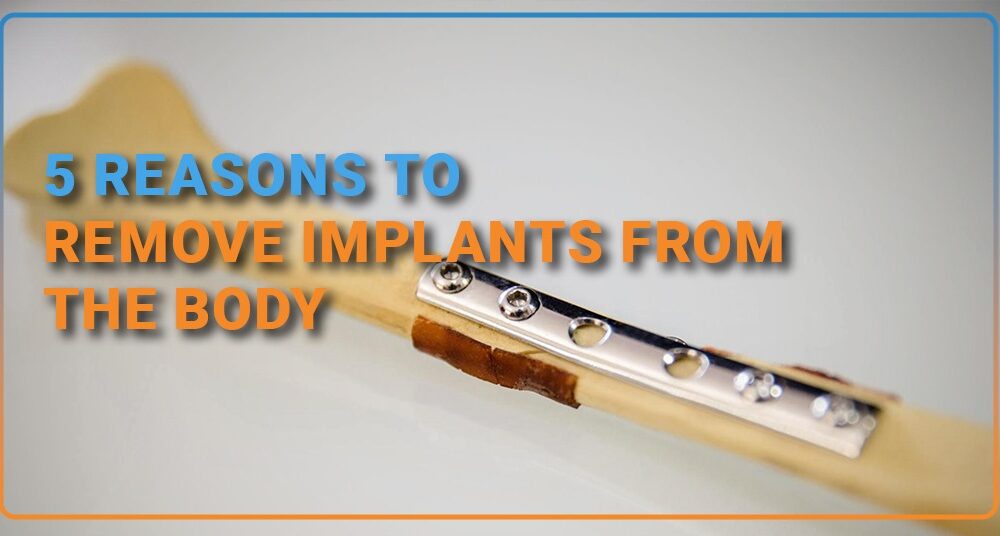
5 reasons to Remove Implants from the Body

Fractures often require metallic implants inside the body for fixation and treatment. The implants help in fracture union and can be in the form of wires, plates, screws, or rods. Is it mandatory to get them removed, or can we have them inside our bodies for a lifetime? What is the best time to get these implants removed from our bodies?

This article will discuss five conditions in which we advise the patient on hardware/implant removal.

1.    Infection

In very few cases, the fracture site or the surgery site (they can be different, especially in nailing) may develop redness, swelling, and pain after the surgery. The patient may also have pus or watery discharge from the site. In these patients, first, we confirm the presence of infection. This can be done clinically if the signs are sure or through blood tests and tests of the pus/discharge from the wound. Usually, infection is treated through antibiotics, either as tablets or through injection. When inside the body, they travel through the blood, reach the area of infection, and kill the bacteria. The implant in the body is a non-living object with no blood supply. If we give antibiotics to these patients, they cannot reach the implant and, hence, cannot eliminate all the infections. The bacteria feel safe on the implant and start making a colony known as BIOFILM. We have to remove the implant and the biofilm to treat infection on the implant. We prioritize the treatment of infection. In the presence of infection, the fracture does not unite. So infection is one condition for which we advise implant removal.

2.    Implant inside joint

Sometimes, the implant may enter the joint cavity in fractures around the joint. This can also happen later if the implant’s position gets changed due to various factors. If the implant is inside the joint, the patient has pain in the joint, and the movements are painful and restricted. This can be diagnosed on radiographs of the joint. In case of multiple plates/screws/wires, we get an exceptional CT done to check precisely which part of the implant is inside the joint. The implant inside the joint must be removed as soon as possible to prevent damage to the joint. In patients where the fracture is not fully healed, we must strike a balance between implant removal and adequate fixation strength to achieve bone union. We try to remove only the screws/wires which are inside the joint and leave the rest to help unite the fracture.

3.    Prominent Implant

Certain areas in our body, such as the wrists and ankles, have fragile tissue over the bones. Sometimes, there is just a skin cover. If fractures around these areas are treated using plates and screws, they can get prominent over time. Prominent implants can also irritate the patient. In patients where nailing is done, the nail tip can irritate. In these patients, we advise implant removal after the fracture has been united. The implant removal can be a total or only the prominent part.

4.    Broken Implant

A broken implant inside the body is another indication of their removal. This is advised even after the fracture is united. Sometimes, the fracture takes longer to unite, and the implant cannot tolerate the stress for extended periods. It can also happen due to substandard quality of the implant, where the implant may have impurities, and where the company does not do strength testing of the implant. Good-quality implants can also break, but that probability is lower.

5.    Patient’s Will

This is the most common indication we encounter in our practice. The patient wants to get the implant removed just because it is a foreign body. The fracture is united, and the implant causes no problems for the patient.

Can you keep the implant lifelong in your body?

If your bones are nicely united and the implant is not troubling you, then yes, you can keep it. (Consult your surgeon first.)

But keep this in mind….

With time, many implants, along with their instruments, get discontinued. You may be getting the best implant available right now, but 15-20 years in the future (maybe due to medical reasons), the implant may get discontinued. If you require implant removal in the future and if the implant is discontinued, the surgery will be done with alternate instruments. The success of surgery then is reduced.

Are there any implants that get absorbed in the body?

Bio-absorbable implants are available, which get absorbed in the body and are replaced by bone over are primarily available as screws and wires and are used in the surgery of tendons and ligaments.

What is Vitamin D deficiency? How to prevent Vitamin D deficiency?

Despite its name, Vitamin D is not a vitamin. It is a hormone that promotes calcium absorption in the body. It is present in very few foods. Our body also produces Vitamin D in the skin when exposed to sunlight.

Risk Factors for Deficiency

·Diet – Not having enough Vitamin D-rich foods

·Lifestyle – People who have less exposure to sunlight, remain ill, or lack outdoor spaces are at risk of developing Vitamin D deficiency. Excess sunscreen use is also a risk factor.

·Pollution – Highly polluted areas block UVB rays, without which the skin cannot produce vitamin D.

·Age – Increasing age decreases the body’s ability to produce Vitamin D.

·People with darker skin need more sunlight exposure to produce Vitamin D.

·Gut diseases such as Crohn’s, celiac disease, etc. These decrease the absorption of Vitamin D from the diet.

·Smoking

·BMI greater than 30

·Kidney and liver diseases

Symptoms

·Getting sick often

Vitamin D makes our immune system strong. Lower levels make the immune system weak, increasing the risk of infections.

·Bone pains, Decreased Bone density

Since Vitamin D increases calcium absorption, its deficiency causes lower calcium levels in the body. This makes them weak and predisposes them to fractures.

Vitamin D deficiency in children causes rickets, and in adults, it causes osteomalacia and osteoporosis. Older people with bone loss need to take Vitamin D with their calcium supplements.

·Muscle pains

Constant and recurrent muscular pain is a widespread and undiagnosed manifestation of Vitamin D deficiency.

·Impaired wound healing

·Hair loss

BOTTOM LINE

Vitamin D deficiency is widespread, and most people are unaware of it!

Prevention

·Increased consumption of Vitamin D-rich foods such as cereals, fortified dairy products, meats, fish, and eggs.

·Increasing sunlight exposure

Although there is no definite time advised, it is said that 15-20 minutes of exposure 2-3 times a week increases the body’s production of Vitamin D. During this exposure, sunscreen should not be used, and one should receive sunlight directly and not through a window.

·You should increase your physical activity, such as cycling, jogging, or walking, decrease your weight, and increase your sunlight exposure.

·Getting treatment for other medical conditions.

·If your Vitamin D levels do not reach the expected levels, you should take supplements to keep Vitamin D in the normal range.

Heel pain (Plantar Fasciitis) – Everything you need to know!

Plantar fasciitis is one of the most common causes of heel pain. It involves inflammation of a thick bank of tissue (plantar fascia) that runs across the bottom of your foot connecting your heel to your toes.

It causes stabbing pain in the heel that’s usually worse after you take your first steps in the morning or after you’ve been sitting for a long time. It tends to improve with activity but worsens again after spending a long time on your feet.

Risk Factors

Female

40-60 years of age

Obese

Often wearing high heeled footwear

Spending many hours standing eg. teachers, workers

Wearing worn out shoes with thin soles.

Having flat feet or high arches

Tight Achilles tendon

Diagnosis

The diagnosis is usually made by history and physical examination.

Sometimes an x-ray shows a bony spur from the heel bone. These are blamed for the pain but recent evidence show they are harmless.

X-ray showing heel spur

Treatment

The treatment is conservative and home based.

Rest

Ice fomentation

Medications – A course of anti-inflammatory decreases pain and inflammation caused by plantar fasciitis.

Physical Therapy – it includes a series of exercises to stretch the plantar fascia and Achilles tendon and to strengthen the lower leg muscles.

Night Splint – A splint to stretch the calf and the arch of the foot is sometimes used. It holds the plantar fascia and Achilles tendon in a lengthened position to promote stretching.

If your symptoms don’t resolve by conservative methods, your doctor may recommend the following:

Steroid injection – They provide temporary relief as they are strong anti-inflammatory.

Surgery – Very rarely needed

An option only when the pain is severe and other treatments have failed.

The plantar fascia is detached from the heel bone relieving the pain.

 Prevention

Lose weight

Keep doing leg and foot stretches

Choose shoes with good support. Avoid high heels

Don’t go barefoot on hard surfaces

Avoid high impact activities like jumping, skipping, jogging.

Smartphone Thumb

(The Unknown Pandemic)

A.k.a.

Whatsapp-itis

Texting Thumb

Gamer’s thumb

In today’s fast world our smartphones are our constant companions. They are used in every sphere of our life. From sending texts, writing e-mails, managing money to scrolling Facebook, swiping Tinder, gaming, our phone is always in our hands.

One may think that these are very simple tasks but for every activity the tendons of our thumb glide in and out of tunnels, the ligaments contact and relax and the thumb goes through a whole lot of movement. These prolonged and repetitive movements can result in tendon inflammation and injury, a phenomenon known as Repetitive Stress Injury (RSI). Since an average person spends several hours on his/her phone, the magnitude of injury can be very high.

The individual usually complains of pain and difficulty in moving the thumb. The pain can also radiate to the wrist and forearm. Some patients also develop swelling at the base of the thumb.

Medically this condition comprises of tendinitis +/- De Quervain’s tenosynovitis.

Prevention

Since ‘prevention is better than cure’, start the following today!

Limit your smartphone usage.

Keep your wrists straight while holding the phone.

Type shorter texts, use abbreviations if possible.

Using autocorrect decreases the amount of typing to be done.

‘Speech to text’ apps relieve your hand altogether.

Avoid using your phone for more than 15-20 minutes at a stretch.

Keep switching hands while using your phone.

Perform wrist and finger stretching daily.

Treatment

The first and most important step of treatment is to avoid over-exerting the thumb.  You can undergo a ‘Smartphone detox’ or use the other hand for using the phone.

Initial treatment consists of a course of anti-inflammatory medicines and regular ice fomentation. If the symptoms are severe and if swelling is present, immobilization with either a splint or cast may be required.

If symptoms don’t resolve, a low dose steroid injection in the thumb may be considered.

Surgical intervention is required in the minority of patients who don’t improve with all the other intervention.

Low Back Pain – Treatment and Prevention

Lower back pain is one of the most common problems in the world. If you’ve ever had a lower back pain stop you from what you’re doing, then you’re not alone. If affects most of the adults at some point in their life. It is also the most frequent reason most people visit an orthopaedician.

What causes lower back pain?

The lumbar region of the spine constitutes your lower back. It carries the weight of the entire upper body putting it under a lot of stress. The lumbar vertebrae along with the discs in between them allow the spine to absorb this stress and affords movements safely.

Acute low back pain is often caused by a sudden injury to muscles or tendons supporting the back. It may also be caused by muscle spasms.

Most of the chronic back pain is “non-specific” (there’s no obvious cause) or “mechanical” (the pain originates from bones, joints or soft tissues in and around the spine. Sometimes it is due to diseases such as spinal cancer, bone tuberculosis and other medical conditions.

Slipped (Prolapsed) disc – The discs between the vertebrae presses on a nerve causing pain, numbness, tingling or weakness

Slipped disc causing nerve compression

Sciatica – Irritation of the sciatic nerve that runs from the lower back to the feet. It causes pain, numbness in the legs and feet.

Spondylolisthesis – the vertebra slips out of its position causing pain and stiffness.

Osteoporosis – Weak vertebrae

Treatment

Chronic back pain is treated with a stepped care approach starting from a simple low cost treatment and gradually increasing to more aggressive and invasive procedures.

Initial treatment consists of

Hot fomentation of the back – it relaxes the spastic muscles and help in relieving the pain.

Resuming activities as soon as possible helps in relieving pain. Bed rest is not recommended.

Exercises to strengthen the core and abdominal muscles are very important.

While sleeping, try lying in a curled up(fetal position) with a pillow between your legs. If you sleep on your back, place a pillow or rolled towel under your knees.

Medications – They include analgesics, muscle relaxants, supplements. If pain is severe then opioid analgesics may also be needed. They should only be taken after consulting a doctor.

10 Tips to prevent Low back pain

1. Exercise regularly to keep muscles strong and flexible.

10 Exercises for Lower Back Pain

2. Lose excess weight. All the extra kilos put extra pressure on your lower back causing strain and eventually low back pain.

3. Maintain a healthy weight and eat a nutritious diet rich in calcium and Vitamin D.

4. While lifting objects follow correct posture. Avoid lifting very heavy objects alone.

Correct way of lifting objects

5. Switch sitting positions often and walk around the office with gentle stretching to relieve tension. Using a lumbar support on the chair also helps.

6. Wear well cushioned shoes.

7. While sleeping, try lying in a curled up(fetal position) with a pillow between your legs. If you sleep on your back, place a pillow or rolled towel under your knees.

8. Quit smoking. Smoking reduces blood flow to the spine causing disc degeneration and osteoporosis.

9. Lighten your wallet – Sitting on an overstuffed wallet over long periods causes discomfort and back pain. If you have to sit for long hours, like in office or driving, remove your wallet from the back pocket.

10. Reduce stress

Why does my neck hurt? 10 Tips to prevent Neck pain

Your neck is made up of small bones called vertebrae which are stacked on top of each other and held in place by ligaments, muscles and joints. This spinal column supports the head and protects the spinal cord. The spinal cord is the main structure which links the brain to the rest of the body. All the messages and sensations like pain, touch travel from the body to the brain via the spinal cord and vice versa.

Neck structure

Because of the structure, the neck has a significant amount of motion and is less protected as compared to the rest of the spine. Any injury, inflammation or abnormality can cause neck pain. In some people the pain may radiate to shoulders, arms and even fingers.

What causes neck pain?

Neck pain can happen due to abnormalities in the bones (vertebra and disc) or the soft tissues surrounding the bones (muscles, ligaments) or the nerves. In rare instances, neck pain may be the result of a tumor or infection.

Many people develop pain and stiffness in the neck due to no specific reason. It may happen due to a minor twisting injury or muscle soreness. This is called non-specific neck pain and is a very common type of neck pain. Sleeping or lying down in an awkward position also predisposes to neck pain. Worry and stress is also a risk factor.

Cervical Spondylosis

The vertebrae have discs between them which act as shock absorbers and protect the vertebrae and other important structures. Cervical spondylosis is a condition where this disc degenerates and start to move out of its position reducing the space between the vertebrae. As this happens, the stress on the vertebrae and the joints increases leading to wear and degenerative disease. This disc may also move backwards (herniated disc) and irritate the spinal cord and the nerves. Cervical spondylosis typically occurs above the age of 40 years but younger individuals are also getting affected nowadays.

Image showing herniated disc and cervical spondylosis

Injury

Because of the flexibility of the neck it is extremely prone to injuries. The injuries can happen after falls, in contact sports or in accidents. Commonly the muscles and ligaments are injured but severe injuries can also cause fracture of the vertebrae which can be life threatening.

Neck pain Symptoms

Pain and stiffness

Initially the pain starts in the middle of the neck or on either side and can spread to upper back, shoulders, arms and the fingers. Sometimes, the pain travels to the back of the head and the eyes. This pain causes muscle spasms which makes the movements of the neck difficult and painful. It is more painful when the neck is moved after sleeping or sitting a long time.

Numbness and Tingling

If the nerves or the spinal cord is compressed or getting irritated, then you may have numbness or tingling sensation in your fingers or hands. Prolonged involvement of the nerves may damage them permanently. This should not be taken lightly and treatment should be started early to prevent permanent damage.

Dizziness and vertigo

Noises from the neck

When to consult a doctor?

If you’ve had an accident and have pain in the neck, you need to consult immediately. A cervical spine injury can cause paralysis and can be even life threatening.

Numbness or pain radiating to the arms, hands or fingers even without significant pain in the neck.

If your neck pain is severe, persistent for days and not relieved by analgesics.

How to diagnose Neck pain?

Your doctor will take a detailed history and examine your neck. He/she will check the presence/absence of any tender spots, muscle spasms, whether there is any numbness or muscle weakness, movements of your neck.

Your doctor may also advice any of the following investigations to arrive at a diagnosis

X-ray

An X-ray of the cervical spine shows the cervical vertebrae with the disc spaces in between them. Bone spurs and degenerative changes are seen in the x-ray. In acute injuries fractures can be diagnosed. Tumors can also be diagnosed in advanced stages.

Normal cervical spine X-ray
X-ray with cervical spondylosis changes

MRI

MRI is the investigation of choice for detailed imaging of soft tissues specially spinal cord and nerves. Bone edema, ligament injuries, herniated discs are very well visualized on MRI.

It is possible to have changes in the X-rays and MRI without any symptom. So the imaging should always be correlated with history and physical examination.

MRI image showing a herniated cervical disc

Blood tests

Blood tests provide evidence of inflammation and infection in the spine. They are also used to diagnose Vitamin D and Vitamin B12 deficiency which may be contributing to your symptoms.

How to treat Neck pain?

Most of the neck pain can be treated by conservative measures, avoiding injury and gradual rehabilitation.

Applying hot packs for 10 minutes at a time for 3-4 times in a day

Medications such as muscle relaxants, analgesics are used for relief in acute pain. Supplements and steroids are also used in selected patients.

Cervical collar – Short term immobilization provides rest to your neck and helps in reducing muscle spasm and reducing inflammation.

In severe conditions, localized steroid injections and surgery are needed.

10 Tips to prevent Neck Pain

1. Use a good posture specially while working. Keep the monitor at eye level. People working on a laptop usually hunch or look down on the screen which causes stress on the neck. Your gaze should be directly at the top third of the screen.

2. Exercise and stretch your neck everyday. Slowly stretch your head in side-to-side and up-and-down motions.

3. Avoid cradling your phone between your neck and shoulder. Hold the phone with the hand or if your hands are busy use hands-free/earphones/headset.

4. Avoid overuse of mobiles. Looking down on a mobile phone puts stress on the neck. Try to limit the usage or take frequent breaks in between. Also while using it keep it at a higher level to lessen neck bending.

5. Carry weights evenly. If your carrying a backpack, make sure to carry it over both the shoulders. For items such as briefcase or a purse, try to travel light and carry essential items only.

6. Stay hydrated

7. Massage your neck. Gentle neck massaging relieves tension and stress in your neck muscles making it relaxed.

8. Sleep on your back or use a soft pillow. The natural alignment is the head being between the shoulders. Try to maintain this while sleeping whether on your back or on your side.

9. Watch TV siting upright and unsupported. Posture must be maintained.

10. Avoid looking at one side to talk to people. This puts stress on your neck. Face poeple while talking to them.

Neck stretching exercises to relieve neck pain

Exercises and gentle stretches makes the neck muscles stronger and limber. A strong neck helps with the pain in the shoulders and upper arms also.

If your pain increases with these exercises, stop right away and consult a doctor.

10 sets of each should be done in each sitting

1. Backward and Forward Tilt

This can be done while standing and when you’re seated.

Keep your back straight and your head squarely over your shoulders.

Tilt your chin towards the ceiling and bring the back of your head towards your back. Hold for 15-20 seconds and return to the start position.

Next lower your chin towards your chest and hold for 15-20 seconds. Relax and return to the original position.

2. Side Rotations

This can be done while standing and when you’re seated.

Keep your back straight and your head squarely over your shoulders.

Slowly turn your head to the left until you feel a stretch in the side of the neck and shoulder. Hold for 15-20 seconds. Relax and return to the original position.

Now repeat on your right side.

3. Side Tilt

This can be done while standing and when you’re seated but standing with feet a bit apart and arms down by your sides is a better position.

Gently tilt your head to the left shoulder and try touching your ear to it without raising your shoulder. Stop when you start feeling a stretch.

Hold for 10-15 seconds and return to the original position.

Neck stretching exercises to relieve neck pain

4. Shoulder Rolls

This is best done in a standing position.

Raise your shoulders straight up and move them in a circle going forward. Do it 5-10 times.

Return to the starting position. Raise your shoulders again and now move them in a circle going backward. Do it 5-10 times.

What are the 10 Best Exercises for Low Back Pain?

Lower back pain is one of the commonest medical problems in the world. You will be affected by it at some point of your life. This can be prevented by stretching and strengthening your back muscles.

Doing exercises to strengthen the lower back helps prevent and alleviate Lower back pain. They also strengthen the abdomen,hip and leg muscles. Exercises also increase blood flow to the lower back speeding up recovery and reducing stiffness.

The great thing about these exercises is that they can be done at home and can be incorporated in your daily routine easily.

1. Knee to Chest Stretch

Lie on your back with your knees bent and your feet lying flat on the floor.

Using both your hands, grab your right leg under the knee and interlace the fingers.

Keeping the left foot flat on the ground, pull your right knee close to your chest until you feel a stretch in your back.

Hold for 20-30 seconds keeping the other body relaxed.

Return to original position and do the same with the left leg.

Repeat 3-4 times for each leg.

To make this stretch more difficult, bring both the knees simultaneously to the chest and hold for 20-30 seconds. Repeat with a break of 15-20 seconds in between.

Knee to Chest Stretch
Double Knee to chest stretch

2. Bridging Exercise

Lie on your back with the knees bent and both the feet flat on the floor.

Squeeze your buttocks and lift your pelvis until the knees, hips and the shoulders are in a straight line.

Tighten the abdomen muscles as well.

Hold for 5-10 seconds.

Repeat 5-10 times with intervals of 10 seconds between them.

Bridging Exercise

3. Pelvic Tilts

Lie on your back with the knees bent and both the feet flat on the floor.

Flatten your back against the floor by tightening your abdominal muscles.

Hold for 5-10 seconds, then relax.

Tilt your pelvis towards the ceiling without lifting it from the floor.

Hold for 5-10 seconds, then relax.

Do 10-15 repetitions.

Pelvic Tilts

4. Partial Crunches

Lie on your back with the knees bent and both the feet flat on the floor.

Keep your arms on your chest or put your hands behind your head.

Lift your shoulders off the floor.

Hold for a second with tightening of your abdomen muscles.

Return to the original position.

Repeat 8-10 times.

Ensure your feet and the lower back are on the floor throughout the exercise.

Partial Crunches

5. Lower Back Rotations

Lie on your back with the knees bent and both the feet flat on the floor.

Gently roll both the knees to one side keeping the shoulders firmly on the floor.

Hold for 5-10 seconds, then return to original position.

Repeat with the knees rolling to the other side.

Repeat a few times.

Lower Back/ Lumbar Rotations

6. Press-Up Back Extension

Lie on your stomach with your hands under your shoulders.

Push with your hands so that your upper body is off the floor.

You can also put your elbows under your shoulders and keep for a few seconds.

Return to original position.

Repeat 5-10 times.

Press Up Extensions

7. Bird – Dog Exercise

This is an excellent exercise to stabilise the lower back during the movements of the arms and legs.

Position yourself on your hands and your knees and tighten your stomach muscles. Don’t let your back muscles sag while doing this exercise.

Lift one leg behind you. Raise to a height where the lower back can be maintained.

Keep the hips level and hold on for 5 seconds, then switch to the other leg.

If possible, try lifting the opposite arm with each leg lift.

Repeat 8-10 times.

Bird Dog Exercise

8. Cat – Camel Stretches

Come onto your hands and knees, making sure your hands are under your shoulders, your knees are under your hips and your back is in a neutral position.

Cat – Lift your head up, sink your back down and stick your tail bone out. Take a deep breath and return to normal position.

Camel – Lower your head and tailbone and arch your back mimicking a camel hump. Take a deep breath and return to normal position.

Repeat 10-15 times.

Cat Camel Stretches

9. Superman

This exercise helps strengthen the back extensors.

Lie face down on the ground. Stretch both arms out in front of the body with both legs stretched out flat on the ground.

Raise both the hands and the feet in the air keeping a distance of 6-8 inch from the ground.

Try to pull in the bellybutton lifting it from the floor to engage the core muscles.

Stretch the hands and feet as much as possible.

Keep the head straight looking at the ground to avoid neck pain.

Hold for 2-3 seconds and then return to the starting position.

Repeat 5-10 times.

Superman Exercise

10. Hamstring Stretches

Hamstring Stretch

Lie on your back with your legs extended and your back straight.

Bend your right knee towards your chest keeping the left leg straight.

Hold the leg/thigh with both the hands and straighten the leg.

Breathe deeply and hold for 10-20 seconds.

Repeat on opposite side.

Stretch to the point of ‘mild discomfort’. Keep both the hips down on the mat.

DISCLAIMER

Discontinue the exercises if your pain increases. These exercises should ideally be done after consulting a doctor.

What does High Uric acid mean? 7 Home remedies to reduce uric acid

Uric acid is a waste product that forms when body breaks down chemicals called purines. Purines are natural chemicals found in the cells of the body as well as foods. Most of the uric acid dissolves in the blood and passes through the kidneys. The kidneys filter it out and the uric acid leaves the body in urine.

It is normal to have low levels of uric acid in the blood. Uric acid levels may get high due to one of the following reasons:

1. The person eats foods that are high in purines.

2. The kidneys are not able to flush out uric acid from the blood adequately.

3. The body is producing too much uric acid.

This leads to a condition called Hyperuricemia. It can lead to formation of uric acid crystals which can form kidney stones. These crystals can also settle in the joints and cause a condition known as Gout, a very painful arthritis. Untreated high uric acid levels can lead to permanent bone, joint and tissue damage, kidney disease and heart disease.

Gout

Gout, or Gouty Arthritis, is common in people with high uric acid levels. It is characterized by sudden, severe attacks of pain, swelling, redness in the joints. The most common joint involved in the base of big toe in the foot but other joints can also get involved.

What are the symptoms of Gout?

The signs and symptoms of gout mostly occur suddenly and commonly at night. The symptoms may flare up occasionally and on other times may resolve.

Commonly involved joint in Gout

Intense joint pain

Gout usually affects the big toe, but can affect other joints as well. Other commonly affected joints include knees, ankles, elbows, wrists and fingers. The pain is severe within the first 12-24 hours.

Joint Discomfort

After the severe pain subsides, some amount of joint discomfort may last for a few days to a few weeks. Repeated gout attacks may last longer and may affect more joints.

Redness

The affected joints become red, warm and inflamed.

Restricted Movements

As the joints get damaged, its movements may get reduced.

Risk factors for Gout

Since gout develops due to high levels of uric acid in the body, the risk factors include all the conditions that increase uric acid levels.

Diet

Having foods rich in purines will lead to greater production of uric acid by the body.

Foods causing high uric acid levels include:

Alcoholic beverages

Meats such as red meat, lamb, pork

Seafood and shellfish including anchovies, sardines etc.

Vegetables such as asparagus, spinach, mushrooms, cauliflower, kidney beans.

Foods to avoid in Gout

Age and sex

Men have a higher level of uric acid level but women reach the same level after menopause. Men are also likely to develop gout earlier.

Family History

If other members of your family have gout, you’re more likely to develop it.

Medical conditions

Medical conditions such as untreated high blood pressure, chronic diseases such as diabetes, metabolic syndromes, heart and kidney diseases.

Medications

Certain medications such as thiazide diuretics (for hypertension), low dose aspirin, anti-rejection drugs after organ transplant, chemotherapy etc.

Recent surgery or trauma

Obesity

When to see a doctor?

If you develop sudden, intense pain in your joints, especially great toe, consult a doctor. Also if your joint is red and tender with fever, consult a doctor immediately to rule out an infection.

How to diagnose Gout?

Blood test

A simple blood test to measure uric acid level is often the first line of investigation. Sometimes it is misleading as some people have high uric acid levels but no symptoms of gout while some people have symptoms but their uric acid level is not that high.

X-rays

X-rays are important to check the joint surfaces, presence or absence of arthritis. In case of a known case of gout, joint destruction may also be seen on X-rays.

Joint fluid analysis

If your joint is swollen then some joint fluid may be aspirated using a needle and sent for examination under the microscope. In case of gout, urate crystals will be seen.

How can I reduce uric acid in my body?

How can I reduce uric acid in my body?

Most people can reduce uric acid with diet and lifestyle changes. Lowering the uric acid levels reduces the risk of gout and prevents flares in people already diagnosed with the condition.

1. Drink plenty of fluids

2. Limit purine rich foods

Since uric acid is produced from purines, limiting purine rich foods reduces uric acid production. Some purine rich foods are good for health, so it is advisable to reduce their intake rather than avoiding them altogether.

Foods with high purine content include:

Alcohol

Sugary foods and beverages

Seafood and shellfish

High fat foods

Most meats including ham, pork, bacon, red meat.

3. Eat more low-purine foods

Switching to low purine foods will lead to lower production of uric acid and hence lower levels in the body. Foods with low purine content include:

Low fat and fat free dairy products

Coffee

Most fruits and vegetables

Most nuts

Foods good in Gout

It is not necessary that dietary changes alone will get rid of gout. It is also important to note that not everyone who eats a high purine diet develops gout. Other factors such as genetics, age, sex also play a role.

4. Maintain body weight

Since obesity is a risk factor for gout, reducing and maintaining a healthy body weight reduces the risk of gout. Being overweight can also cause high blood pressure and cholesterol levels which are individual risk factors for elevating uric acid levels.

If you plan to reduce your weight, it should be done slowly and gradually with a plan. Rapid weight loss also increases uric acid levels.

5. Avoid alcohol and sugary drinks

High consumption of both alcohol and sugary drinks – sodas, sweetened juices increase uric acid levels in the body. They also lead to potential weight gain which further increases the risk.

6. Drink Coffee

Some research has indicated that drinking coffee decreases the risk of developing gout and the risk decreased as the consumption increased. Since drinking too much coffee may be harmful for other body systems, it should be consumed in moderation.

7. Avoid certain medications

Certain medications such as diuretics, low dose aspirin and certain immunosuppressants raise uric acid levels in the body. Since these drugs were started to you for some essential health benefit, you should contact your doctor regarding them.

What is Runner’s Knee? Tips and Exercises to prevent Runner’s Knee

Also known as Patellofemoral Pain Syndrome, Runner’s knee is a broad term for pain in the front, around or behind the knee cap.

As the name suggests, running is a common cause of runner’s knee, but any activity that puts repeated stress on the knee joint can cause this disorder. The list includes walking, skiing, biking, hiking, jumping to name a few. It affects 10-15 % of all runners at some point of time.

What causes Runner’s Knee?

Unlike other sports injuries, there is no actual damage associated with Runner’s knee initially. It is mostly an overuse injury cause by repeated stress on the knee. This repeated stress causes inflammation of the tissues around the knee cap especially fat, bursal and synovial tissue. In normal conditions, these tissues provide joint lubrication and cushioning to the knee but in inflammation, they become painful.

Some risk factors for the development of Runner’s knee include:

  • Overuse – Activities/Exercises that bend the knees repeatedly is one of the common causes. It can also be caused by sudden change in physical activity such as increasing the number of days you exercise in a week or increasing the duration or intensity of the activity.
  • Problems with the feet – Flat foot, hypermobile feet (joints in the feet move more than they should) or foot hyperpronation (foot rolls inwards when you walk) change the way you walk altering the biomechanics, leading to knee pain.
  • Patellar Malalignment – In this condition, the patella (knee cap) moves abnormally in the trochlear groove (femur bone). When the knee is bent, the patella is pushed to one side of the groove which causes increase in pressure between the patella and the groove.
Patellar Malalignment
  • Unbalanced Quadriceps – The patella bone is the continuation of the quadriceps muscle in front of your thigh. Any weakness or tightness of the quadriceps will not let the patella move in the right spots causing higher stress and pain.
  • Chondromalacia Patella – It is a condition in which the cartilage of the patella softens and starts to break down. Since the cartilage does not have any nerves so the cartilage damage does not directly cause any pain. However, it leads to inflammation of the synovium which causes pain. In advanced cases when full thickness cartilage loss occurs in a part of the bone, rubbing of the bone with another surface causes pain.
Chondromalacia Patella

Symptoms

  • The most common symptom is a dull pain in or around the front of the knee. It generally begins gradually and keeps on increasing as the activity increases. It can be associated with a lot of activities apart from running like walking, squatting, kneeling, climbing or descending stairs.
Pain in Runner’s Knee
  • Pain increased/started after increasing exercises or increasing the intensity of exercises.
  • Pain in front of the knee after sitting for a long period of time with your knees bent.
  • Some patients can also complain of swelling of the knee.
  • Crackling sounds is also heard from the knees of some people.

How to manage a Runner’s Knee?

Most people with Runner’s knee can be effectively managed at home.

The first step in the management of Runner’s knee is to stop the activities that hurt your knee. The activities should be discontinued until your pain is resolved. You can also change your training routine to low-impact activities such ac cycling, swimming which puts less stress on your knees.

The initial treatment consists of RICE protocol.

Rest – Avoidance of activity causing pain.

Ice – Apply ice packs to the knee and adjoining part for 10-15 minutes at a time, several times in a day.

Compression – Apple compressive elastic bandage to the knee from leg to thigh to prevent development of additional swelling in the knee. Be careful that the bandage is not too tight.

Elevation – Keep your leg on an elevated level while sitting and lying down. This helps reduce swelling in the knee.

Medications – You can take an Over-the-counter (OTC) non-steroidal anti-inflammatory drug (NSAID) such as diclofenac, ibuprofen to reduce the pain and swelling.

If your pain and swelling doesn’t improve or gets worse, you need to consult an orthopedician immediately.

6 Tips to prevent Runner’s Knee

1. Doing warm up before physical activity.

2. Quadriceps and hamstring muscles should be stretched and made flexible in your warm ups.

3. If you’re overweight, you need to loose the extra kilos to maintain your overall health.

4. Use proper shoes for training.

5. Always increase the intensity and duration of your training/physical activity gradually. This makes your body adjust to the increased stress and decreases the chance of injury.

6. Avoid activities involving deep squatting, hopping, repetitive stair climbing.

10 Exercises for Runner’s Knee

1. Straight Leg Lift

Lie down flat on your back with one knee bent and the other leg extended straight on the floor.

In the straight leg, tighten the quadriceps (thigh muscle) and raise it to about 45 degrees to the floor.

Hold at this angle for 2-3 seconds and then slowly lower it to the ground.

Repeat 15 times and switch legs.

Straight Leg Lift

2. Hamstring stretch

Lie down flat on your back.

Bend your right leg and put your hands around your right thigh.

Start pulling your leg towards you. As you pull you will feel a stretch in the back of your thigh.

Pull as much as possible with your knee straight.

Hold for 15 seconds.

Repeat 3-5 times for each leg.

Hamstring Stretch

3. Clam Exercise

Lie on your side with both your hips and knees bent and your feet on top of each other.

Slowly raise the top leg towards the ceiling with your heels touching each other, thus forming a clam shape.

Hold for 2 seconds then lower the leg.

Repeat 15 times. Switch legs.

Do 2-3 sets for each leg.

Clam Exercise

4. Side Lying Leg Lift

Lie on your left side with your legs straight and on top of each other.

Support your head with your left hand and use your right hand for body support.

Gently raise your right leg off your left leg.

Hold for a few seconds and bring it down.

Do 15 times for each leg.

Side Lying Leg Lift

5. Donkey Kick

Start on all 4 with your arms straight with wrists under the shoulders and knees under the hips.

Slowly lift your left leg backwards till the hip height keeping your ankle bent.

Push your heel towards the ceiling then bring it back down.

Straighten your leg, hold for 2 seconds then lower it back down.

Repeat 10 times then switch sides.

Donkey Kick

6. Standing Quad Stretch

Stand straight.

Bend your right knee and grab your right foot with your right hand behind your body.

Bring your right heel as close to your glutes as possible without causing pain. Keep your body upright. Take support if needed.

Hold for 10-15 seconds. Repeat for other side.

Perform 2-3 times for each side.

Quad Stretch
Quad Stretch with support

7. IT Band Stretch

Stand with your left leg crossed over your right.

Raise your right hand over your head and keep your left hand over your left thigh for support.

Slowly lean towards the left until you feel a stretch in your right thigh.

Hold for 15 seconds and repeat for the other side.

Repeat 3-5 times.

IT Band Stretch

8. Standing Calf Stretch

Stand facing a wall. Put your hands on the wall at your eye level.

Move one leg forward with the knee bent.

Keeping both the heels fixed on the ground move lean the wall until you feel a stretch in the calf muscles of your back leg.

Hold for 15 seconds and switch legs.

Repeat 3-5 times.

Standing Calf Stretch

9. Step Up

Place your left foot on a step.

Put all your weight on your left leg lifting your right leg off the floor.

Straighten and tighten your left leg and hold for a few seconds.

Repeat 10 times, then switch legs.

Step up Exercise

10. Wall Slide

Begin by standing with your back against the wall. Your feet should be shoulder-width apart and about 6 inch in front of your body.

Slowly slide your back and hips down the wall until your knees are bent to about 45 degrees.

Hold for about 5 seconds, then stand up.

Repeat 10-15 times.

Wall Slide
DISCLAIMER

Discontinue the exercises if your pain increases. These exercises should ideally be done after consulting a doctor.

What are the 10 Best Exercises to Relieve Knee Pain?

Knee pain is a very common and disabling condition. To some it causes mild discomfort while to others it affects their daily activities.

Exercises increase strength and flexibility, reduces joint pain, and helps combat fatigue.Start by exercising gradually and build up over time. Remember to carry on if your symptoms ease to prevent them from returning.

1. Straight Leg Lift (lying down)

Lie down flat on your back with one knee bent and the other leg extended straight on the floor.

In the straight leg, tighten the quadriceps (thigh muscle) and raise it to about 45 degrees to the floor.

Hold at this angle for 2-3 seconds and then slowly lower it to the ground.

Repeat 15 times and switch legs.

2. Straight Leg Lift (Sitting)

Sit well in a chair with back support.

Straighten one leg and hold for a count to 10. Then slowly release your leg.

Repeat this atleast 10 times for each leg.

As you improve, try the exercise with light weights tied on your ankle.

3. Leg Cross

Sit on the side of the bed or on a chair. Cross your ankles over.

Push your front leg backwards and back leg forwards against each other until your thigh muscles become tense.

Hold for 10 seconds, then relax.

Switch legs and repeat. Do four sets with each leg.

4. Knee Straightening/Stretch

In lying down position, place a rolled up towel under your ankle. Bend the other leg at the knee.

Use the muscles of the straight leg to push the back of the knee firmly towards the bed.

Hold for 5 seconds and then release slowly.

This exercise helps strengthen the quadriceps and prevents your knee from becoming permanently bent.

5. Standing Quad Stretch

Stand straight.

Bend your right knee and grab your right foot with your right hand behind your body.

Bring your right heel as close to your glutes as possible without causing pain. Keep your body upright. Take support if needed.

Hold for 10-15 seconds. Repeat for other side.

Perform 2-3 times for each side.

Standing Quad Stretch
Standing Quad Stretch with support

6. Step Up

Place your right foot on a step.

Put all your weight on your right leg lifting your left leg off the floor.

Straighten and tighten your right leg and hold for a few seconds.

Repeat 10 times, then switch legs.

7. Clam Exercise

Lie on your side with both your hips and knees bent and your feet on top of each other.

Slowly raise the top leg towards the ceiling with your heels touching each other, thus forming a clam shape.

Hold for 2 seconds then lower the leg.

Repeat 10 times. Switch legs.

Do 2-3 sets for each leg.

8. Hamstring Stretch

Lie down flat on your back.

Bend your right leg and put your hands around your right thigh.

Start pulling your leg towards you. As you pull you will feel a stretch in the back of your thigh.

Pull as much as possible with your knee straight.

Hold for 15 seconds.

Repeat 3-5 times for each leg.

9. Calf Stretch

Stand facing a wall. Put your hands on the wall at your eye level.

Move one leg forward with the knee bent.

Keeping both the heels fixed on the ground move lean the wall until you feel a stretch in the calf muscles of your back leg.

Hold for 15 seconds and switch legs.

Repeat 3-5 times.

10. Sit/Stands

Sit on a chair. Without using your hands for support, stand up and then sit back down. Make sure movement is slow and controlled.

Repeat for one minute.

The chair should be at a comfortable height.

As you improve, try increasing the number of sit/stands you can do in a minute.

DISCLAIMER

Discontinue the exercises if your pain increases. These exercises should ideally be done after consulting a doctor.